Can a simple change in placement and connections turn your living room into a true home theater?
Yes — and it’s easier than many people think. With the right projector and a reliable IPTV source, you can enjoy a large, cinema-like screen at home. Careful planning, basic picture tweaks like focus and keystone, and neat cable management make a big difference.
This short introduction explains what the full iptv projector setup guide covers: converting a living room, bedroom, or basement into a comfortable home cinema using a streaming device, laptop, or a smart unit with built-in apps.
What matters most for a great viewing experience is simple: control room light, choose correct placement, use a decent screen or a prepared wall, and secure stable connections. This article is for first-time owners, cord-cutters, and anyone moving from TV to a big-screen system.
We’ll walk you through choosing the room and screen, placing the unit, connecting devices via HDMI, adjusting image settings, and setting up audio and network reliability. For more on the big-screen experience, see a practical overview at big-screen experience, and for detailed configuration steps check configuration steps.
Key Takeaways
- Plan placement and cable routes early for safety and neatness.
- Control ambient light and use a proper screen or painted wall.
- Use HDMI connections and test image adjustments like focus and keystone.
- Improve audio with external speakers for fuller sound.
- Follow legal, reliable streaming habits and practical troubleshooting.
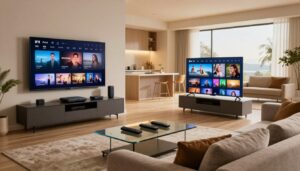
Why Watch IPTV on a Projector for a Home Theater Setup?
A large projected image can change how you feel about movie night. A much bigger screen pulls you into sports, live TV events, and films in ways that small displays rarely do.
Strong picture size boosts immersion: when the image fills your field of view, action and crowd noise feel closer. This is great for big matches and cinematic moments.
Bigger screen impact
Projectors deliver a far larger picture than most tvs. That size makes content feel more cinematic and social for groups.
Projectors vs. TVs in a real room
TVs win for bright rooms and instant use. Projectors save space when not in use and offer a huge screen, but they need a clear throw path and better light control.
What good image quality looks like
Good image quality means sharp edges, readable menus, natural skin tones, and deep blacks that don’t look gray. Resolution, brightness, contrast, and color accuracy all matter.
- Tradeoff: amazing at night, easily washed out by daylight or bright lamps.
- Realistic bar: even top gear needs a darkened room and a proper screen to shine.
- Decide by habits: if most viewing is after dark and you can control light, the size payoff is worth it.
| Factor | Projectors | TVs |
|---|---|---|
| Screen size | Very large (up to 120″+) | Limited by panel size (50″–85″) |
| Ambient light sensitivity | High—needs dark room | Low—bright-room friendly |
| Space when idle | Minimal footprint (ceiling or shelf) | Permanent large cabinet or stand |
| Image dependents | Resolution, brightness, contrast, color | Panel quality, HDR performance, brightness |
For further device background, see what is an IPTV box.
What You Need Before You Start Your Home Cinema Setup
A reliable home cinema begins with a few key choices about image, cables, and sound.
Projector basics that matter for video
Resolution defines detail. Choose one that matches your content for crisp text and fine detail.
Brightness (lumens) matters if you can’t fully darken the room. Higher numbers help in bright spaces.
Contrast controls depth and black levels. Good contrast makes movies look richer at night.
Essential accessories
- A reliable streaming device or smart apps built into the unit.
- An HDMI cable of appropriate length — it carries both video and audio reliably.
- Stable power and a simple remote or mobile control.
Audio options
Built-in speakers work for casual viewing, but external speakers improve dialogue and impact.
Consider a soundbar or an AV receiver with speakers for fuller sound. Plan audio early so your wiring and ports match.
| Item | Why it matters | Tip |
|---|---|---|
| HDMI cable | Carries high-quality video and audio | Use good brand and correct length |
| Speakers / Soundbar | Improves dialogue and immersion | Match outputs: HDMI ARC or optical |
| Screen & lighting | Controls perceived quality | Dark room + decent screen = best results |
Room Setup Basics: Space, Ambient Light, and Seating
Where you place your screen and seats decides comfort and image quality more than gear alone. Think of the room first: small changes in light and layout give the biggest boost to your viewing experience.
How ambient light washes out the image
Ambient light is the number-one enemy of contrast. Even a single bright window can wash colors and flatten shadow detail.
Fixes: use blackout curtains, dimmable lamps, and avoid direct light on the screen. These steps restore brightness and depth quickly.
Picking the best room
Living rooms offer more space but usually more windows to manage. Bedrooms are easier to darken and work well for casual viewing.
Basements often give the best natural contrast because they stay dark. Choose the room that fits your routine and available space.
Seating, lens care, and ventilation
Aim for the center of the screen to sit at or slightly above eye level. Keep viewing distance proportional to screen size to reduce eye strain.
Do a quick layout test before permanent mounting: place the projector temporarily, check image size, and make sure the throw path stays clear during normal foot traffic.
Keep vents clear, avoid tight enclosures, and clean dust off the lens occasionally. Proper airflow and a stable surface prevent mid-game shutdowns and preserve image quality.
For tips on using a projector as a TV and matching brightness to your room, see use a projector as a TV.
Choosing a Projector Screen (or Wall) for Better Picture Quality

A clean, correctly sized screen or wall turns good gear into a great picture. The surface you use affects brightness, contrast, and how fine details and colors appear.
Common screen materials and when ALR helps
Dedicated screens usually beat a bare wall for consistent color and smoother texture that preserves resolution. Matte white gives balanced color and wide viewing angles.
Higher-gain materials boost perceived brightness for darker rooms or lower-lumen units. Ambient-light rejecting (ALR) screens help in living spaces with light sources nearby.
Choosing screen size and matching throw distance
Pick a screen size your room and lens can actually fill. Measure throw distance and compare it to the projector’s throw chart before buying.
Too large a screen reduces perceived sharpness; too small wastes the immersive benefit. Test projection with real content whenever possible.
Aspect ratio and avoiding stretch or crop
Most live TV and streaming use 16:9, so a 16:9 ratio keeps images and scoreboards intact. Older 4:3 content appears with bars—avoid stretching to fill the frame.
Quick wall checklist
- Smooth, clean surface with neutral paint.
- Minimal texture and no gloss to avoid hotspots.
- Placed away from direct light for stable image quality.
Projector Placement and Mounting for a Clean Home Theater Look
A steady mount and correct distance save you from constant image fiddling.
Ceiling mount vs. table placement
Ceiling mounting gives the cleanest look and repeatable alignment. It hides cables in a short run and keeps the unit out of traffic.
Table placement is easier to test and move. Use a stable shelf and a lock or strap to prevent accidental knocks.
Throw distance and lens height
Measure throw distance against the lens chart so the image fills the screen. Physically moving the unit is better than heavy digital resizing.
Set lens height so menus and subtitles sit near eye level. Center the lens horizontally to cut keystone needs.
Cable management and safety checklist
- Run cables along baseboards or inside raceways; label each end.
- Keep power separate from signal cables and use strain relief on HDMI.
- Mount rated for weight, secure fasteners, and no cords across walkways.
| Placement | Pros | Cons |
|---|---|---|
| Ceiling mount | Stable alignment, hidden cables | Harder to adjust, needs proper mount |
| Table / shelf | Easy testing, quick moves | More visible cables, risk of knocks |
| Temporary cart | Portable for demos | Least secure for daily use |
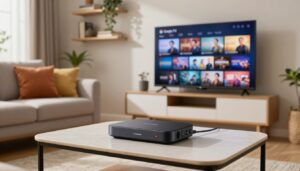
iptv projector setup guide: Connecting IPTV Devices to Your Projector

A clean signal path and the right cables ensure the picture and sound arrive without fuss.
Best connection: HDMI from a streaming stick, set-top box, or laptop
HDMI is the simplest, most reliable option for both high-quality video and audio in one cable.
Plug the streaming stick, box, or laptop into an HDMI port, power the device, then select the matching input with the unit’s Input/Source button or menu.
Older ports: VGA and component explained
VGA is an older analog display option that carries only video. Component splits color channels and also needs a separate audio run.
These legacy options work for older gear, but they complicate audio routing compared with HDMI.
Switching inputs and managing multiple sources
Use the input menu to hop between console, Blu-ray, and streaming devices. If ports are limited, add an HDMI switch for easy selection.
Route audio over HDMI when possible, or send sound separately to a receiver or soundbar for better performance.
Wi‑Fi on smart units and choosing a legal subscription
Smart models connect to Wi‑Fi, install apps, and receive firmware updates for stability. Keep network and settings current for smooth playback.
Choose a reliable, legal service for consistent content and support. If you want a legal option, learn more about GetMaxTV at GetMaxTV’s offer.
Dialing In Image Settings for Sharp Focus, Accurate Color, and Contrast
Getting crisp text and natural color starts with a few simple image checks. Follow a clear order and you’ll avoid needless tinkering.
Start with alignment and focus
Place the unit so the lens hits the center of the screen. Set image size, then adjust focus so menus and subtitles are sharp across the frame.
Use keystone sparingly
Keystone fixes trapezoid distortion but reduces effective resolution. Move the device first; use electronic keystone only for small corrections.
Match resolution and refresh rate
Set the source to the native resolution and a compatible refresh rate to avoid scaling, judder, or flicker. This improves perceived picture quality immediately.
Balance brightness and contrast
Lower brightness in dark rooms for deeper blacks. Raise brightness in mixed light so the image stays punchy. Tune contrast to keep shadow detail without clipping.
Pick the right picture mode
Movie/Cinema gives accurate color for night viewing. Vivid/Dynamic helps in bright rooms when you need more pop.
“Physically align first, focus second, then make small electronic adjustments for the best results.”
| Adjustment | When to use | Impact |
|---|---|---|
| Focus | Always after placement | Sharp text and menus |
| Keystone | Small angle fixes | May soften edges |
| Brightness/Contrast | Dark vs. mixed light | Better blacks or punch |
| Picture Mode | Night vs. day viewing | Color accuracy or pop |
Quick real-content check: test with live sports (motion), a dark movie scene (contrast), and a news channel for text clarity. For tips on streaming quality and image impact, see streaming quality.
Audio Setup for a True Home Theater Experience
Good sound turns a big picture into a true home theater experience. Built-in projector speakers are fine for casual viewing, but external gear makes dialogue clearer and bass fuller. Even a modest soundbar lifts sports, news, and movies noticeably.
Soundbar and speaker hookups
Common audio paths route sound to a soundbar or an AV receiver. This moves vocals and effects off tiny onboard speakers and into dedicated speakers for better clarity.
Wired connection options
- HDMI ARC/eARC: single hdmi cable carries high-quality audio and remote control. Best when both devices support ARC or eARC.
- Optical (TOSLINK): reliable digital option for clear sound when ARC isn’t available.
- Analog out: RCA or 3.5mm works as a fallback for older receivers or powered speakers.
Bluetooth: convenience vs. delay
Bluetooth looks tidy and removes a cable, but latency can cause lip-sync issues with live video. Use it for casual listening, not for content where timing matters.
Fixing lip-sync
Start by checking the audio output selection on the source. If delay persists, try a wired hdmi or optical route. Most soundbars, receivers, and projectors include audio delay/settings to shift sound and match the video.
“Pick one master volume device—usually the soundbar or receiver—to keep control simple.”
| Connection | Best for | Pros | Cons |
|---|---|---|---|
| HDMI ARC/eARC | Modern soundbars/receivers | High quality, single cable, remote pass-through | Requires compatible ports |
| Optical | Digital audio without ARC | Stable digital sound, widely supported | No advanced formats (e.g., Dolby Atmos) |
| Analog (RCA/3.5mm) | Older amps or powered speakers | Simple and universal | Lower fidelity, more cables |
| Bluetooth | Wireless convenience | No cables, easy pairing | Latency risk, variable quality |
Quick tips: choose wired first for live sports and news, use audio delay settings to fix lip-sync, and set the soundbar or receiver as the single master volume. Small upgrades to sound and speakers deliver one of the largest returns on viewing enjoyment.
Streaming IPTV Smoothly: Network, Apps, and Playback Stability
Smooth streaming depends as much on a steady network as it does on good hardware. A stable link keeps HD and 4K video playing without freezes and keeps the whole home viewing experience pleasant.
Wi‑Fi placement and stability for HD and 4K streaming
Stable streaming means consistent bandwidth, low interference, and devices that perform well during peak evening time. Test speeds where the projector sits before final mounting.
Tips: avoid placing the unit or streaming stick behind thick walls or inside cabinets. Move the router closer or add a mesh node as needed.
Keep software updated
Smart projectors and streaming devices run setup wizards and periodic firmware updates. Install updates for apps and system software to improve performance and security.
Reduce buffering: practical checks
- Run a speed test at the display—aim for stable Mbps for your chosen stream quality.
- Reduce network congestion by pausing large downloads or using wired Ethernet where possible.
- Switch Wi‑Fi bands (2.4GHz vs 5GHz) as an option if interference is high.
- Reboot router and devices when problems persist; many issues clear on restart.
App settings can help: choose a stream quality that matches your connection to avoid constant drops. Small changes in settings save time and keep video quality steady.
“A perfect image is worth little if it freezes at the big moment.”
Troubleshooting Common Projector Setup Problems

Troubleshooting starts with simple confirmations that rule out the small causes before bigger fixes.
No signal: input checks and cable handshake
First step: confirm the display is set to the correct input. Reseat the HDMI or try a different port.
Reboot the source and the projector. If the handshake still fails, swap cables or test a second device to isolate the faulty cable or port.
Blurry or distorted image
Physically align the unit with the screen, set the correct distance, then use focus and zoom for sharpness.
Avoid heavy electronic keystone — move the projector instead. Minor adjustments often restore edge clarity and image quality.
Dim picture
Check ambient light first: close curtains or change lamps. Next, review picture mode and brightness settings.
Consider the screen surface; a proper screen boosts perceived contrast more than a few extra lumens.
No audio or lag
Confirm audio output and volume on both devices. Test wired connections before Bluetooth.
Use the audio delay or lip-sync setting when sound lags. Try HDMI ARC or optical if problems persist.
Basic maintenance
Gently clean the lens with a microfiber cloth and keep vents clear. Replace or clean filters per the manual.
Prevent overheating by ensuring good airflow and avoiding enclosed spaces. Test after each step so you know which change fixed the issue.
“One clear test at a time finds the real cause faster than changing five settings at once.”
Conclusion
Finish strong by focusing on room choice, screen surface, and simple tuning for best results.
Pick the right room, choose a proper screen or painted wall, and place the projector so you avoid heavy keystone corrections. Then connect your source through the most reliable path and tune image quality and audio for comfort.
Three quick wins: control ambient light, minimize keystone with good placement, and use a better screen surface when a wall won’t do.
Keep devices updated and your network stable to protect the viewing experience. Small tweaks over time to seating, screen size, and picture modes will keep improving the picture and audio.
If you want a legal IPTV subscription to use with your projector setup, check GetMaxTV’s offer. For Fire TV Stick connection steps see how to connect a Firestick.
FAQ
What screen size should I choose for a home cinema to get the best viewing experience?
Pick a screen that fits your room and seating distance. A common rule is to sit at about 1.5 to 2.5 times the diagonal for 1080p content and closer for 4K. Measure throw distance and compare it to the lens specifications of your device so the image fills the screen without overspill. Also factor in wall space, furniture layout, and whether you’ll use a fixed screen or retractable option.
How much does ambient light affect image quality and how can I control it?
Ambient light can wash out contrast and reduce color punch. Use blackout curtains, dimmable lighting, or position the screen away from direct windows. Anti‑glare and ALR (ambient light rejecting) screens help in brighter rooms. If you can’t fully darken the space, increase brightness and adjust contrast while avoiding overly vivid color modes.
Which cables and inputs are best for streaming live TV and video from a streaming stick or box?
HDMI is the best choice for clean audio/video and must be your primary connection from a streaming stick, set‑top box, or laptop. Use high‑speed HDMI cables for HD and 4K content. Older devices may require VGA or component adapters, but they won’t carry digital audio and limit image fidelity.
How do I get a sharp, edge‑to‑edge focused image?
Start by positioning the lens perpendicular to the screen, set the projector at the correct throw distance, then adjust focus slowly while displaying text or a test pattern. If the image is still uneven, slightly move the unit to align the lens and reduce keystone correction, which can soften edges when overused.
When should I use keystone correction versus physically moving the device?
Keystone correction fixes trapezoid distortion but can soften the picture. Whenever possible, move or mount the projector so the lens is level with the screen center and use minimal keystone. Reserve digital correction for small alignment tweaks.
What are practical seating distance and eye‑level tips for comfort during long movie sessions?
For comfort, set seats so viewers’ eyes are near the screen center vertically. Keep viewing distance at the recommended multiplier for resolution (1.5–2.5× diagonal for 1080p). Arrange recline and cushioning to prevent neck strain and keep aisles clear for easy access.
How do I decide between built‑in speakers, a soundbar, or an AV receiver for better audio?
Built‑in speakers work for casual viewing but lack depth. A good soundbar is a compact upgrade with clearer dialogue and virtual surround. An AV receiver with separate speakers is best if you want true home theater immersion, multi‑channel audio, and expansion options. Match the audio gear to room size and budget.
Can I stream directly using a smart display device or should I use an external streaming stick?
Smart displays with native apps simplify streaming, but external streaming sticks or boxes often offer more app choices, faster updates, and better wireless performance. Use an external device if you need specific apps, Ethernet connectivity, or higher performance for 4K playback.
How do I reduce buffering and improve playback stability for HD and 4K streams?
Ensure your router is close to the streaming device or use a wired Ethernet connection when possible. Use 5 GHz Wi‑Fi for less interference and prioritize QoS or ethernet backhaul for streaming. Close background apps on devices and keep firmware and apps updated.
What brightness and contrast settings work best for dark rooms versus mixed light rooms?
In dark rooms, lower brightness and set contrast to preserve shadow detail; use a Cinema or Movie picture mode with warm color temperature. In mixed light, increase brightness and contrast moderately, and consider a Vivid or Dynamic mode if you can’t control ambient light. Calibrate with real content and adjust slightly by eye.
How do I fix audio lip‑sync and ensure proper synchronization?
Most receivers and TVs include an audio delay or lip‑sync setting—adjust it in small increments while watching a dialog scene. If using Bluetooth, expect some delay; wired HDMI ARC/eARC or optical connections give the best low‑latency results.
What maintenance keeps my unit running reliably and sounding great?
Clean the lens with a microfiber cloth and approved cleaner, vacuum or replace air filters per the manual, and ensure vents have clearance to prevent overheating. Keep firmware updated and store the remote batteries fresh to avoid intermittent control issues.
How do I manage cables for a clean, safe home theater installation?
Plan cable routes before mounting: use in‑wall rated HDMI or conduit for permanent installs, zip ties, and cable raceways for visible runs, and label both ends of each cable. Leave service loops and secure power cables away from walkways to reduce trip hazards.
What screen material choices should I consider and when is ALR worth the extra cost?
Matte white screens give accurate color and wide viewing angles for dark rooms. ALR materials reject off‑axis light and are worth it if you can’t fully control ambient light or if the projector sits near windows or lamps. Consider gain ratings to balance brightness and viewing angle.
How do I match resolution and refresh rate between my streaming device and display?
Set the streaming device output to the projector or screen native resolution and a supported refresh rate (usually 60Hz for TV content, 24Hz for many films). Use device menus to force 4K/60 if both ends support it. Mismatched rates can cause judder or scaling artifacts.
Are there legal or reliability tips for choosing a live TV subscription service?
Choose reputable providers that offer legal content, clear channel lineups, and stable apps. Verify device compatibility, supported resolutions, and customer support policies. Well‑known services like Sling TV, YouTube TV, Hulu + Live TV, and Philo are common choices for dependable streaming.