
Can a home stream look as crisp and stable as a broadcast feed without turning your router into a bottleneck? If you want a sharp, fast-starting stream that resists buffering, this guide is for you.
You’ll learn what a 4k iptv encoder settings checklist looks like and how an iptv encoder fits into your workflow. Start with a clear goal: a stable UHD stream that plays well on typical U.S. home connections.
Small mistakes in bitrate, codec choice, or network setup matter much more at higher resolution. One wrong choice can cause visible artifacts, buffering, or audio drift. This guide shows practical starter choices—HEVC vs H.264, 30 vs 60 fps, and a 15–25 Mbps baseline—then how to tune for fast action like sports.
We emphasize testing, monitoring, and legal distribution so you deliver a professional viewer experience. For lawful services and consistent quality, consider providers such as GetMaxTV as a reference point without turning this into a sales pitch.
Key Takeaways
- Define a clear goal: sharp, stable UHD playback on typical U.S. home networks.
- Choose the right encoder type and start with recommended bitrates for your content.
- Codec, fps, and network choices affect perceived quality more at higher resolution.
- Test and monitor streams; adjust for sports and fast motion.
- Respect legal distribution and consider reputable services like GetMaxTV.
What a 4K IPTV encoder does in your streaming workflow
Think of the encoder as the bridge that turns your camera feed into a deliverable internet stream. It sits between your source—camera, switcher, or set-top box—and the delivery system that reaches viewers.
How an IPTV encoder compresses video for IP networks
Your device performs real-time compression so large raw frames become a manageable digital file for delivery. That trade-off pairs a codec with a bitrate to keep detail while lowering size.
Encoder vs. transcoder for adaptive streaming needs
An encoder usually makes one clean 4K feed for distribution. A transcoder on the server can then produce 1080p and 720p versions for adaptive playback. Fewer re-encodes and a clean input reduce dropped frames and errors.
- Your encoder handles capture and initial encoding; servers handle versioning and CDN distribution.
- Right input quality and fewer conversion steps improve reliability.
- Choose features on your device based on what you must do locally versus in the cloud.
| Task | Typical Location | Why it matters |
|---|---|---|
| Capture & initial encoding | On your device | Prevents downstream quality loss |
| Transcoding for ABR | Server / CDN | Creates multiple bitrates for players |
| Distribution & caching | CDN | Reduces latency and buffering |
Before you move on, decide which tasks must run on your local box and which can live on the server. That choice guides which features and reliability options you need to buy or build.
For practical device options and comparisons, see a focused guide.
Why 4K changes the rules for quality, bandwidth, and reliability
When you step up to ultra‑high definition, the math of pixels and bandwidth changes how you configure every part of the chain.
Resolution matters: UHD is 3840×2160 versus 1920×1080. That is four times the pixels, so compression must work much harder and your bitrate needs jump accordingly.
4K UHD vs. 1080p and why bitrate climbs
Think of it as the “math you feel”: four times the pixels means more data per frame. To keep motion sharp you must raise bitrate or accept visible compression.
Low bitrate in UHD doesn’t just soften detail. It can blotch shadows, add noise in gradients, and smear fast motion in sports or action scenes.
Where viewers notice resolution most: sports, live events, and premium content
Viewers spot problems fastest in sports, rapid pans, stage lighting at live events, and cinematic content with fine texture.
- The faster the motion and the richer the detail, the more bitrate headroom you need—especially at 60 fps.
- Higher bitrates push your network; weak Wi‑Fi or unstable upload rates show up as buffering and drops.
- Use this rule: increase bitrate and prioritize wired links for demanding video to protect quality and reliability.
| Aspect | 1080p | UHD |
|---|---|---|
| Pixels | 1920×1080 | 3840×2160 |
| Typical bitrate need | 5–8 Mbps | 15–25+ Mbps |
| Where issues show | detail loss | macroblocking, motion smearing |
Next, you’ll learn how your choice of device type, cabling, and transport protocols must tighten up once you move to UHD.
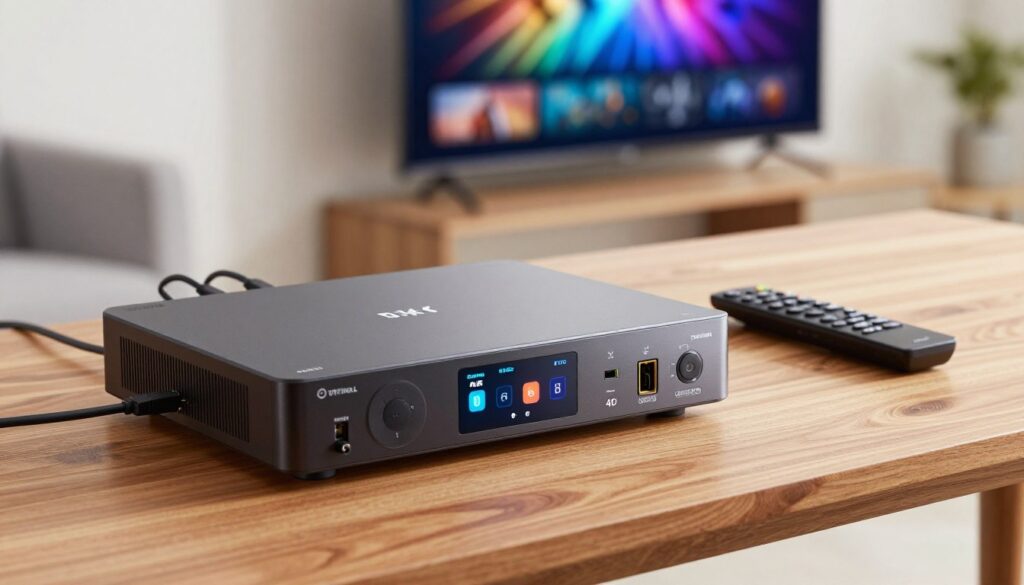
Choose your IPTV encoder: hardware vs. software options
Choosing between a PC-based workflow and a purpose-built device boils down to flexibility versus uptime. Pick the path that matches how you plan to run your channel and how much hands-on work you want to do.
Software solutions (OBS, vMix) give you low startup cost and creative control. They run on a high-end computer and can handle heavy compression when the CPU/GPU has headroom.
Use software if you do short broadcasts, controlled shoots, or already own a powerful machine. Expect updates, OS quirks, and occasional reboots.
When dedicated hardware makes sense
Hardware units are built for long-term, unattended operation. They offer stable thermal design, predictable latency, and fewer surprises during 24/7 operation.
Choose hardware when you need continuous channels, remote reliability, or fixed latency for live events.
Specs to prioritize
- Codec support: H.264 and HEVC options affect compatibility and bitrate efficiency.
- Protocol outputs: RTMP, HLS, and SRT coverage is essential for flexible delivery.
- Inputs and outputs: HDMI or SDI, plus multi-stream capability if you need simultaneous feeds.
- Operational needs: cooling, power conditioning, and serviceability for long runs.
For quick vendor reference, compare brands like Haivision, AJA, Magewell, Kiloview, and Teradek against your requirements. Buy to fit your workflow, not the sticker price.
| Use case | Recommended solution | Why it matters |
|---|---|---|
| Short, flexible shows | Software on a strong computer | Low cost and easy to change |
| 24/7 channel | Dedicated hardware | Predictable uptime and latency |
| Hybrid / studio | Hardware + software tools | Best mix of reliability and features |
Inputs, cabling, and capture: HDMI and SDI setup basics

The physical signal path matters as much as any software choice. The chain is simple: source output → correct cable/connector → encoder input → monitoring loop‑out (if available) → network. Build that chain carefully and you avoid many common problems.
HDMI 2.0 for home and pro workflows
HDMI 2.0 is the usual plug‑and‑play choice for single 4K sources in a home studio or small control room. Use high‑quality HDMI cables and keep runs short to avoid handshake problems and signal loss.
Watch for mismatched frame rates and monitor the source to prevent intermittent drops.
SDI for broadcast‑style reliability
When you need locking connectors and long runs, 12G‑SDI inputs win for reliability. SDI keeps connections stable in venues and rack installations where you can’t afford surprises.
Choose HDMI for simple home setups and SDI for venue or headend use. Remember: a noisy input can’t be fixed later. Clean capture gives you the quality and reliability you want.
| Aspect | HDMI 2.0 | 12G‑SDI |
|---|---|---|
| Typical use | Home studio, single device | Live venue, rack systems |
| Cable/run length | Short ( | Long (100s of meters with proper cable) |
| Connector | Push fit, consumer | Locking BNC, broadcast |
| Reliability | Good for simple setups | Higher for pro workflows |
For quick hardware comparison and capture advice, check these practical guides at quick guides.
Network requirements for stable 4K streaming over IPTV
Before you tweak encoding choices, confirm your internet path can carry the load.
Upload speed target: treat ~25 Mbps upload as a practical floor for a single UHD stream. Run a few speed tests at different times of day and add 20–30% headroom for other household use.
Speed alone won’t save you. Jitter, packet loss, and congestion break a high‑bitrate feed even when a test shows enough bandwidth. Monitor latency and dropped packets during a trial stream.
Wired Ethernet is the safest path. Use gigabit Ethernet to reduce packet loss and retransmits. Avoid running your iptv encoder over mesh hops or shared Wi‑Fi when possible for best stability.
Use DHCP with a router reservation or assign a static IP to your encoder so you can always reach its web UI. Open port 1935 for RTMP if your contribution workflow needs it, and check firewall rules.
| Issue | Impact | Fix |
|---|---|---|
| Bufferbloat | High latency under load | Enable QoS / upgrade router |
| Overheated router | Drops and resets | Improve ventilation / replace unit |
| Mesh hops | Variable throughput | Use wired backhaul |
For deeper operational tips and tests to validate your configuration, see this performance guide.
4k iptv encoder settings you can start with today
Start with a practical preset you can paste into your device and test on your home network right away.
Starter preset you can copy:
- Resolution: 3840×2160, Codec: HEVC/H.265 (or H.264 if you need older device compatibility).
- Frame rate: 30 fps (use 60 fps for sports or fast motion).
- Bitrate: 15–25 Mbps baseline for HEVC; increase to 30–45 Mbps for heavy action.
- Rate control: VBR preferred; use CBR if your ingest server requires predictability.
- Audio: AAC stereo @ 128–192 Kbps.
Codec choice: efficiency vs. compatibility
HEVC saves roughly half the bitrate for similar quality, giving you better efficiency. Use H.264 when you must support older boxes or TVs that lack HEVC support.
Frame rate and resolution rules
Choose 30 fps for talk shows, news, and general channels. Move to 60 fps for sports, concerts, and anything with fast pans.
Bitrate and bit control
Start in the 15–25 Mbps range for HEVC. If you see macroblocking during fast pans or dense textures, raise the bitrate first.
CBR vs VBR
VBR usually gives better perceived quality by spending bits where needed. CBR can be safer when the network or ingest needs steady bandwidth.
Audio that matters
Viewers often notice poor audio more than small video flaws. Use AAC at 128–192 Kbps for stereo. Increase for multi‑channel or premium music streams.
What to change first if problems appear:
- Lower frame rate before lowering resolution.
- Switch to CBR only if your contribution path demands fixed throughput.
- Raise bitrate if motion artifacts appear; check network health before cutting quality.
| Parameter | Starter Value | When to change |
|---|---|---|
| Codec | HEVC/H.265 (H.264 for compatibility) | Use H.264 if many viewers use older devices |
| Frame rate | 30 fps (60 fps for sports) | Increase to 60 fps for fast motion |
| Bitrate | 15–25 Mbps baseline (HEVC) | Raise to 30–45 Mbps for heavy action |
| Rate control | VBR preferred | Use CBR for strict ingest limits |
| Audio | AAC @ 128–192 Kbps | Use higher audio bitrate for music or multi‑channel |
For deeper tuning examples and protocol tips, see this practical guide on bitrate and quality or this walkthrough on achieving consistent playback performance tuning.
Protocol and output configuration: RTMP, HLS, and SRT
Matching transport tech to the job keeps your stream low-latency where it matters and widely playable where it counts. Choose the protocol based on which leg you’re configuring: contribution (your device to server) or delivery (server to viewers).
RTMP for contribution and low-latency pushes
RTMP is the common workhorse for ingest. Use it when you need a simple, widely supported way to push a stream to a platform or headend.
It keeps contribution latency manageable, but it has limits for modern adaptive workflows. Many CDNs accept RTMP for ingest, then transmux to HLS or DASH for delivery.
HLS for broad compatibility and adaptive delivery
HLS wins on compatibility. It plays on phones, TVs, and most players, and it supports adaptive bitrate for mixed viewer networks.
Expect higher end-to-end delay compared with ingest protocols, but you gain stability and broad reach for large audiences.
SRT for secure, resilient transport
SRT is ideal when you send from venues or unstable networks. It adds packet recovery, encryption, and good low-latency performance.
Choose SRT for contribution when reliability and security matter more than universal legacy support.
Quick selection guide:
- RTMP — use when your server requires legacy ingest and you need low contribution latency.
- HLS — use for delivery to the widest set of devices and for adaptive playback.
- SRT — use for secure, resilient contribution over unpredictable networks with low delay.
Configuration reminders: Match the protocol to what your server or CDN accepts. Test end-to-end at target bitrates; a successful connect doesn’t prove stable playback at high bandwidth. Monitor latency, dropped packets, and retransmits during trials.
| Leg | Recommended protocol | Why it fits |
|---|---|---|
| Contribution (encoder → server) | RTMP or SRT | Low-latency ingest; SRT adds error correction and security |
| Delivery (server → viewers) | HLS | High compatibility and adaptive bitrate support |
| Unstable networks / venues | SRT | Resilience and encryption for unreliable links |
Latency tuning for live viewing and interactive streams

Latency is the invisible lag that turns a live moment into an old one; you can control much of it. End-to-end latency is the total time from camera or source to the viewer’s screen, not just the internal delay on your box.
How device choices and protocols affect end-to-end delay
What you can change: frame rate, GOP/keyframe cadence, B-frames, and buffer size. Lowering GOP length and disabling long B‑frame chains reduces encoding delay.
Protocol choice matters. RTMP often gives low contribution delay. SRT can match low delay while adding recovery and security. HLS usually adds more time on delivery.
When ultra-low latency matters most
For live sports and tight interactive events, you want viewers to react in near real time. Short delay keeps commentary and social feeds in sync with play, avoiding spoilers.
“Reduce hops, use clean SDI/HDMI capture, and avoid extra transcoding to shave seconds off the total delay.”
- Reduce hops: fewer processing steps cut aggregated delay.
- Use hardware: dedicated devices often deliver lower encode delay than general-purpose PCs.
- Balance: pushing latency too low can harm quality and cause rebuffering.
For a practical checklist and contribution tips, see this guide on encoder configuration for live streaming.
| Area | Action | Result |
|---|---|---|
| GOP / keyframe | Shorten to 1–2s | Lower delay, slightly higher bitrate |
| Buffers | Reduce player buffering | Faster view time, less resilience |
| Transport | Use RTMP/SRT for contribution | Lower end-to-end delay |
Testing, monitoring, and proving stream quality before you go live
Do not guess—measure your stream end-to-end with repeatable tests and clear pass/fail criteria. Run private tests that mimic your live workflow so you can tune bitrate and configuration without risking viewers or reputation.
Run controlled test streams
Method: start at your target bitrate, then step down in 10% increments until visible artifacts appear. When you see problems, step back up one level and mark that as your safe baseline.
What to monitor during tests
- Dropped frames and playback stalls in the player.
- Encoder CPU, temperature, and process stability for software encoders.
- Network packet loss, jitter, and upload consistency from your router.
- Bitrate swings if you use VBR—note peaks and troughs.
Use objective quality checks
PSNR and SSIM give you numbers to compare changes objectively. They help when visual inspection is inconsistent across scenes. Use them as a baseline, not the only test.
Test with the hardest content and document results
Choose fast sports clips, crowd shots, and textured scenes. These reveal compression faults much faster than talking heads.
Record your configuration, the date and time, and test notes so you can spot ISP congestion or daily bandwidth dips.
Go / no‑go checklist
| Check | Pass criteria | Action if fail |
|---|---|---|
| Playback quality | No macroblocking at baseline bitrate | Raise bitrate or lower fps |
| Stability | Zero dropped frames for 10 minutes | Investigate CPU, temp, or cables |
| Network | Packet loss | Move to wired link / adjust QoS |
For a deeper vendor comparison and more testing tools, see this video encoders guide.
Reliability and maintenance for continuous, professional operation
Plan for continuous run time by building redundancy, thermal care, and safe update routines into your workflow.
What professional reliability looks like: your stream runs for days without babysitting, recovers from brief link issues, and resumes normal operation after a hiccup. Aim for systems that tolerate temporary packet loss or a short power blip without service loss.
Redundancy features worth paying for:
- Dual power supplies and UPS support so hardware survives outages.
- Automatic failover and watchdog auto-reboot to recover from hangs.
- Multi-stream output so you can send to primary and backup destinations simultaneously.
Firmware and safe updates
Back up your configuration and document current values before updating. Perform updates during low-traffic time. Verify a short test stream after the upgrade before returning to full operation.
Heat management and cabling
Encoding at high loads generates heat. Keep ventilation clear, avoid sealed racks, and use fans or shallow cabinets when needed. For uptime, prefer locking SDI runs for long cables and clean HDMI for short studio links. Use strain relief to prevent connector fatigue.
| Area | Recommended feature | Result |
|---|---|---|
| Power | Dual PS + UPS | Survives outages, reduces downtime |
| Failover | Auto-switch + watchdog | Auto recovery from hangs |
| Thermal | Ventilation & active cooling | Prevents throttling and crashes |
| Cabling | SDI for long runs, HDMI for short | Stable inputs and fewer drops |
Choosing legal, dependable services
Only distribute content you have rights to. Pick providers that operate legally and offer clear SLAs. For a dependable, legal option you can review, see the main offer at GetMaxTV.
For operational checklists and a practical quality checklist, consult this quality guide.
Conclusion
Make predictable streaming a habit. Combine the right iptv encoder with clean HDMI/SDI capture, a wired home network, and repeatable tests to get reliable 4K results.
Start simple, then optimize: use a proven HEVC baseline, then tune frame rate and bitrate for motion and bandwidth. Test with real content so you know when to raise or lower parameters.
Remember: quality is end‑to‑end. Protocol choice, latency goals, and regular maintenance matter as much as the device itself. Follow this guide to keep video and content consistent for viewers.
For a legal IPTV subscription and a dependable service to pair with your workflow, check GetMaxTV at https://watchmaxtv.com.
FAQ
What does an IPTV encoder do in your streaming workflow?
An encoder captures live video from HDMI or SDI sources, compresses it with a chosen codec, and packages the stream for delivery over IP networks. It turns raw feed into a network-friendly stream that your CDN or streaming server can distribute to viewers with minimal latency and consistent quality.
How does an IPTV encoder compress video for IP networks?
The device uses codecs like H.264 or HEVC to remove redundant data and reduce bitrate. Encoders apply techniques such as motion estimation and variable quantization to balance visual quality against bandwidth. Proper bitrate, GOP structure, and encoder profiles help prevent buffering and keep stream stability across variable networks.
What’s the difference between an encoder and a transcoder for adaptive streaming?
You use an encoder to convert camera output into a deliverable stream. A transcoder takes that stream and produces multiple renditions at different bitrates and resolutions for adaptive delivery (HLS/DASH). If you need multi-bitrate outputs for viewers on varied connections, add a transcoder or a multi-bitrate capable encoder.
Why does 4K change rules for quality, bandwidth, and reliability?
Ultra-high resolution increases pixel data and perceived motion detail, so you need more bitrate and stronger network reliability. Higher resolution exposes compression artifacts more easily, so you must prioritize efficient codecs, stable upload speeds, and lower packet loss to maintain a premium viewing experience.
How does UHD compare to 1080p and why does it affect bitrate?
UHD has roughly four times the pixels of 1080p, so it requires proportionally higher bitrate to preserve detail—especially for fast motion like sports. That means planning for higher bandwidth, more robust encoding profiles, and often HEVC to keep file sizes and stream consistency reasonable.
Where will viewers notice UHD most—sports, live events, or on-demand content?
Fast-action sports and live events highlight the benefits of higher resolution and frame rates because detail and motion clarity improve perceived quality. Premium content like nature documentaries also benefits, while talking-head shows gain less from the added pixels.
When does software encoding with OBS or vMix make sense?
Use software encoders for flexible production, lower upfront cost, and when you already run a powerful PC. They’re great for occasional streams, multi-source mixing, and scenes with overlays. For continuous 24/7 channels or mission-critical events, consider dedicated hardware alternatives.
When should you choose a dedicated hardware encoder?
Pick hardware encoders for long-term reliability, lower latency, and predictable performance under sustained load. They handle constant bitrates, offer robust I/O (HDMI/SDI), and reduce CPU variability, which is vital for broadcast-grade, always-on channels and pro events.
Which specs should you prioritize when selecting an encoder?
Focus on codec support (HEVC/H.265 and H.264), low latency, protocol compatibility (RTMP, HLS, SRT), multiple inputs, and hardware acceleration. Also check reliability features like redundant power, stream failover, and Ethernet port quality for stable delivery.
What are HDMI 2.0 considerations for UHD sources in home and pro workflows?
Use HDMI 2.0 or higher to ensure full-resolution feeds at desired frame rates. Verify cable quality and EDID handling so your capture device recognizes resolution/frame-rate combos. For home setups, ensure your capture card or encoder supports the HDMI spec you need.
When is SDI preferred over HDMI?
SDI offers locking connections, longer cable runs, and broadcast-grade reliability. It’s the better choice for studio, OB vans, and pro events where signal stability and grounding are critical. Use SDI for mission-critical feeds and HDMI for shorter, consumer-level setups.
What upload speed should you target for UHD streaming?
Plan for a minimum of about 25 Mbps dedicated upload per UHD stream as a practical floor. That gives headroom for CBR or higher VBR peaks, and reduces the chance of rebuffering. If you run multiple streams or higher frame rates, increase capacity accordingly.
Should you use wired Ethernet or Wi‑Fi for stability?
Always choose wired Gigabit Ethernet for stability, lower packet loss, and consistent latency. Wi‑Fi can work for low-stakes streams, but it’s prone to interference and variable throughput—risking dropped frames during high-motion content.
What router and IP settings help avoid connectivity bottlenecks?
Use QoS to prioritize streaming traffic, reserve static IPs or DHCP reservations for encoders, and enable jumbo frames if your network supports them. Check MTU consistency and disable unnecessary services that can introduce latency or CPU load on the router.
Which codecs should you pick for efficiency and compatibility?
Choose HEVC (H.265) for efficiency at high resolutions, which lowers bandwidth needs at comparable quality. Use H.264 for widest compatibility with legacy devices. Many setups use H.265 for master outputs and H.264 transcodes for broad device support.
What resolution and frame rate combinations should you use—30 fps or 60 fps?
For talk shows and static content, 3840×2160 at 30 fps is often sufficient. For sports and fast motion, 60 fps improves smoothness and clarity. Match your frame rate to the source and to viewer expectations to avoid judder or unnatural motion.
What bitrate targets work as a baseline and when should you increase them?
Use 15–25 Mbps as a baseline for acceptable UHD quality under HEVC. Increase bitrate for higher motion or complex scenes; for H.264 you’ll need higher rates. Always test your specific content to find the lowest bitrate that preserves quality.
Should you use CBR or VBR for live delivery?
CBR gives predictable bandwidth use and plays well with many CDNs and network constraints. VBR improves average quality for variable scenes but requires headroom in your network. For adaptive streaming, VBR can be paired with multiple renditions to maximize efficiency.
Which audio settings will viewers notice?
Use AAC with 48 kHz sampling for good compatibility. Bitrates between 128–192 kbps provide clear stereo sound; increase to 256 kbps or use multi-channel audio for immersive events. Keep sync and codec consistency between audio and video to avoid playback issues.
When is RTMP the right protocol for output?
RTMP is ideal for contribution to legacy streaming platforms and low-latency ingest to many CDN endpoints. It remains useful for real-time contribution but lacks modern security and error correction compared with newer transports.
Why choose HLS for delivery to viewers?
HLS offers excellent device compatibility and adaptive bitrate playback, which lets players switch renditions based on network conditions. It introduces higher latency than some protocols but gives broad reach across smart TVs, mobile, and browsers.
What advantages does SRT offer for secure, reliable transport?
SRT provides encryption, packet loss recovery, and jitter buffering to maintain stream integrity over unpredictable networks. It’s excellent for remote contribution and studio-to-cloud links where reliability and security matter.
How do encoder choices affect end-to-end latency?
Encoder settings like GOP length, frame buffering, and chosen protocol directly influence delay. Shorter GOPs and low-latency modes reduce delay but may increase bandwidth. Pair low-latency encoder settings with SRT or low-latency CMAF to minimize end-to-end lag.
When does ultra-low latency matter most?
Ultra-low latency is critical for live sports betting, interactive streams, auctions, and any real-time viewer interaction. For passive viewing like on-demand content, standard HLS latencies are usually acceptable.
How should you run test streams before going live?
Run controlled tests with representative content and multiple network scenarios. Start with short-duration streams at your target bitrate, then increase duration and stress the network to spot dropped frames, encoder overload, or overheating.
What key metrics should you monitor during tests and live runs?
Watch for dropped frames, buffer fill, CPU/hardware utilization, packet loss, and jitter. Track stream stability over time and log any bitrate spikes. Use PSNR or SSIM to objectively compare quality against a reference when fine-tuning.
What redundancy features matter for continuous operation?
Look for redundant power supplies, stream failover to a secondary encoder, and multi-stream output so you can route to different CDNs. These features reduce single points of failure and keep your service available during hardware faults.
How do you upgrade firmware safely without disrupting configurations?
Back up your current configuration, apply updates in a maintenance window, and test on a staging unit first. Follow vendor instructions closely and keep a rollback image handy in case the new firmware introduces issues.
What maintenance helps prevent long-session instability?
Ensure proper ventilation, avoid stacking heat-sensitive gear, and check fans and vents regularly. Schedule firmware checks and replace aging components before they fail to maintain long-term reliability for continuous streams.
How do you choose a dependable streaming service and what should you look for?
Pick providers with strong SLAs, wide CDN coverage, low-latency options, and clear support channels. Verify codec and protocol support, multi-bitrate delivery, and compliance with rights management. Real-world uptime and customer references help validate trust.
Where can you review third-party offers and services?
Check reputable trade sites, professional reviews, and vendor documentation for feature comparisons and case studies. Look for up-to-date resources and independent performance tests to find a partner that matches your technical and operational needs.